Let’s face the facts; our hectic schedules leave us with very little time for #self-care. We often neglect to spare a few minutes to take a rest and allow the body to really relax.
The entire day we go about running around, from appointment to appointment, meeting errands, and in the end, we rarely do anything to relieve all the tension that builds up on our tired feet. If you ask us, times like these call for some pampering!
So, how do you give yourself an amazing pedicure from the comfort of your own home, you ask? We’ll tell you. Read on to learn how to pamper your feet with this at-home pedicure guide.
But First, Are There Any Benefits To Getting A Pedi?
When you really think about it, your feet have it pretty rough. In fact, they drew the short straw and are tasked with carrying and balancing our entire body weight. Treating yourself to an easy DIY pedicure is a fun and simple way to show your feet some love -- plus, they will look and feel great!
Here are some of the top benefits to getting an at-home pedicure:
Benefit #1: It’s Inexpensive.
Except for the tools, which are really only a one-time purchase, pedicures can be done multiple times at home with no added cost -- so you’ll never have to worry about burning a hole in your pocket for simply pampering your feet.
Benefit #2: It’s Super Hygienic.
Another great benefit to giving yourself a pedi at home is that you’re not sharing any of your tools with hundreds of other people as you would in the salon, making it so much more hygienic. And with the pandemic sweeping over the nation, you can bet your bottom dollar that we’re going to do anything and everything we can to keep good hygiene our number one priority!
Benefit #3: It Improves Blood Flow.
Giving your feet and lower legs a little massage (now’s your time to guilt your partner into a massage) will help your lymph nodes remove toxins to help improve blood flow.
Benefit #4: It’s Oh-So Relaxing.
Treating your feet to an at-home pedicure is a perfect way to relax the muscles and joints in your feet. This is especially beneficial for those who frequently experience sore feet at the end of a working day.
Benefit #5: It Promotes Healthier Skin.
With a pedicure, you’ll help soften and reduce painful calluses and other visible skin issues, such as inflammation and dryness. You’ll also exfoliate and cleanse your skin, giving you that squeaky-clean and smooth feeling.
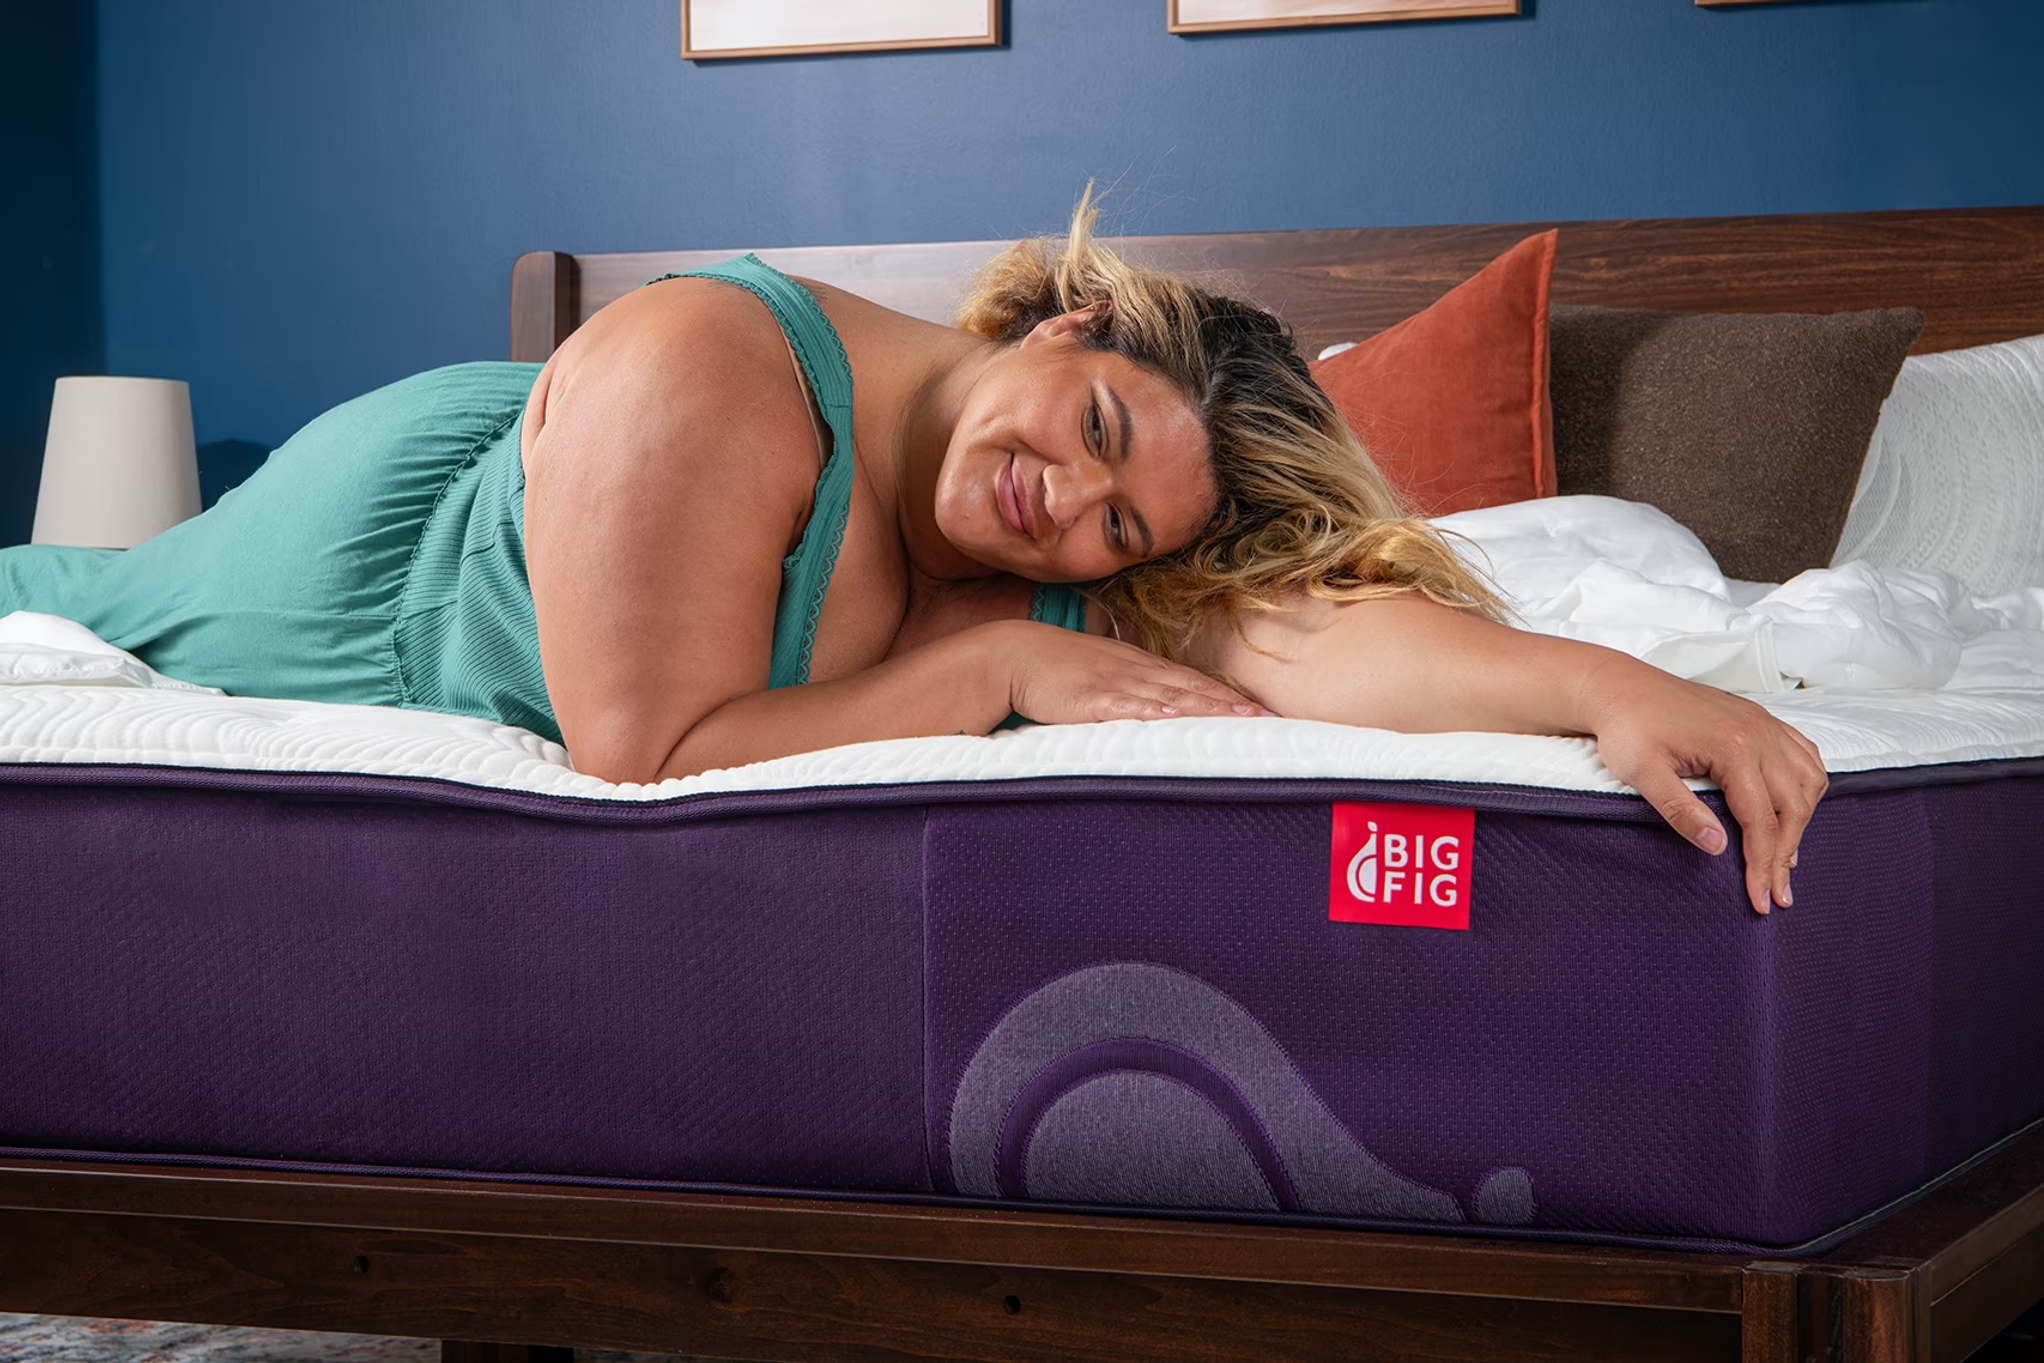
Benefit #6: You Can Do It Anywhere -- Like On Your Bed.
Another awesome benefit to an at-home pedicure is that you can literally do it anywhere -- in your room, in the kitchen, on the patio, wherever (okay, maybe don’t do it at the local mall or in the middle of a restaurant).
Our favorite place to pamper our feet for some serious relaxation is on our Big Fig Mattress -- the mattress made for bigger figures. This deliciously soft yet unbelievably supportive mattress will delicately cradle your body as you give your feet some TLC. Now, if that’s not some serious pampering vibes, we don’t know what is!
Step-By-Step At-Home Pedicure Guide
Before you begin, make sure to carve out a little bit of time for yourself. Moving slowly will not only give you the best results, but it’ll also give you time to really pamper your feet -- they do a lot for you, and they deserve it!
Follow these steps below and get to pampering:
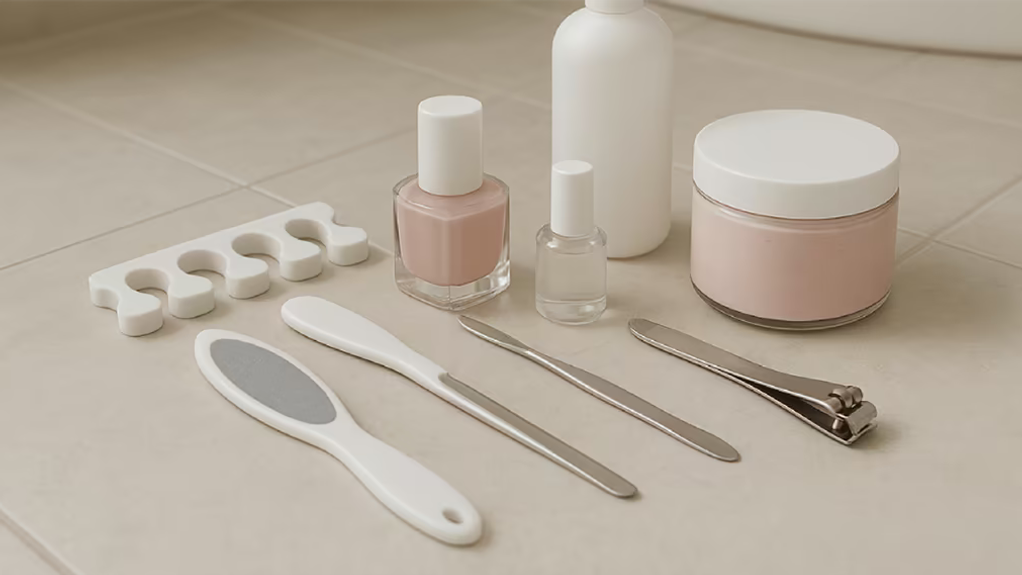
Step 1: Prep Your Nails
Time to *finally* get rid of the remnants from your last pedicure (seriously, how long have you been rocking that chipped-as-hell pink on your toes?) and do a proper polish removal!
To remove every little last bit of color, soak a clean cotton pad in nail polish remover and hold it on each nail for a few seconds to allow the old paint to break down before you start swiping. If you want that perfectly smooth, “I just dropped $200 on my toes” lacquered finish at the end -- don’t skimp over this step.
Pro Tip: If you’re left with any funky stains or yellow tinge (you’ll usually see this after removing darker colors, like black and red), rub cuticle oil over the surface of your nails to lighten any residue.
Step 2: Soak Those Babies
Before you start soaking, your first task -- and this is *super* important -- is to go around your and gather every single candle you can find. Oh, and while you’re at it, pour yourself a glass of wine. You see, the trick to making an at-home pedicure feel like a luxurious spa experience instead of, you know, rubbing your own feet in your too-small-for-comfort studio apartment, is setting the ~mood~ at your makeshift pedicure station.
Once the ambiance is just right, you’re ready to soak your toes and feet -- which will soften tough skin and cuticles (and is just downright relaxing). We suggest using a basin (aka a really big bowl) if you have one, but your bathtub is also a good option. Fill ‘er up with warm water and add a heft scoop of skin-soothing bath salts.
Let your tired feet soak for a few minutes before moving to the next step.
Pro Tip: Up the ante on your pampering experience by adding a few drops of your favorite essential oil to make the process a bit more relaxing. Rose oil is a great option because it’s super-hydrating, antimicrobial, and great for sore muscles and cramps. Lavender is another great option, especially if you’re pampering your feet right before bed. We also love tea tree, eucalyptus, and peppermint essential oils, which are all deodorizing, analgesic, and refreshing.
Step 3: See Ya Never Dead Skin
Now that you’re totally relaxed and your skin has softened, it’s time to remove all those icky dead layers. Remove your feet from the basin (or tub) and pat them dry.
Get your foot file or a pumice stone and go to town on your calluses, removing any and all dead skin. Be sure to really focus on your heels and any other calloused hard areas. Scrape away until your feet feel smooth, but don’t scrub them ray -- you could end up causing irritation, which is deff not fun.
Step 4: Trim, Moisturize, And Massage
Take your handy-dandy nail clippers and cut your toenails straight across. Then, gently file the edges round to keep ingrown nails at bay. Moisturize the tops and soles of your feet with your favorite hydrating lotion, massaging deeply in a gentle circular motion to increase circulation and reduce swelling.
Pro Tip: If you have an S.O., this would be the time to utilize their amazing massage services (wink, wink).
Step 5: Paint Your Toenails Like A Pro
If you’ve ever wondered what the secret is at professional salons, we’ll tell you. Are you ready? Here it is: Paint your toenails in three (not two and not five) strokes. Begin near your cuticle and paint a broad stroke right down the center of the nail toward the tip. Fill in the left and right sides with similar motions. Wait roughly two minutes, then apply another coat.
Pro Tip: When you’re not using your favorite polish, make sure you store it in the fridge to make it go on smoother and make the color last longer!
Bottom Line
Showing your feet some TLC has a ton of amazing benefits. Apart from making you feel oh-so relaxed, it helps treat cracked heels, dryness and also helps improve the health of your toenails. Sounds pretty awesome, right? We think so, too!
Here at Big Fig, we’re pretty big fans of pampering ourselves. That’s why we created the Big Fig Mattress -- the mattress for a bigger figure. With our incredible 20 year warranty (yep, you read that right), you’ll be waking up refreshed and ready for pretty much everything for a really long time.
Whether you want to lay back and pamper your feet with a DIY pedicure or watch Friends reruns from sunup to sundown, the Big Fig Mattress is here for you.
Sources:
Should you keep your nail polish in the fridge? | Chicago Tribune
Bath Safety: how to use essential oils safely in the bath | Tisserand Institute